A wardrobe wastes bedroom space when its doors collide with furniture, its shelves sit beyond reach, or its interior cannot accommodate the way you actually dress and travel. By measuring the room, calculating capacity, comparing layouts and specifying access, lighting and hardware, you can create a storage system that uses more of the available space without making daily use harder.
Key takeaways
- Measure finished walls and every obstruction before selecting a wardrobe layout.
- Separate daily clothing, luggage and future storage needs before sizing compartments.
- Use full-scale drawings or taped floor plans to check clearances before fabrication.
- Specify accessible organizers, LED lighting and moisture-resistant interior materials.
Measure the bedroom before choosing a wardrobe layout
Record the room’s finished wall lengths, ceiling height, and every obstruction before choosing a wardrobe layout. Measure from finished wall to finished wall, then note skirting-board depth, columns, radiators, vents, sockets, switches, windowsills, curtain tracks, and ceiling bulkheads.
- Measure each door opening, including the frame, and draw its full swing arc. Keep door swing clearance clear of drawers, handles, and the bed.
- Mark each window’s width, height from the floor, sill projection, curtains, and required access for cleaning.
- Measure the bed, bedside tables, and walking routes. Record the narrowest clearance left when doors or drawers open.
- Note ceiling sprinklers, smoke detectors, beams, sloped sections, and any zone that could obstruct a wardrobe lift.
- For an accessible storage position, reserve at least 30 by 48 inches of clear floor space. Place frequently used controls and pulls between 15 and 48 inches above the finished floor where the 2010 ADA Standards apply.
| Layout | Space to verify | Typical conflict |
|---|---|---|
| Single-wall | One uninterrupted wall and front clearance | Bedside furniture blocks opening |
| L-shaped | Two usable walls and the inside corner | Doors or drawers collide at the corner |
| U-shaped | Three walls plus a continuous aisle | The centre aisle becomes too narrow |
| Walk-in | Entry width, turning space, and ventilation | Shelving restricts the route |
| Freestanding | Stable floor area and rear clearance | Skirting or outlets prevent a flush fit |
Use a dimensioned elevation or full-scale mock-up before fabrication. A plan drawing can miss a drawer hitting a door, a hanging garment rubbing the door, or a lift entering a sprinkler or ceiling zone. Include the real door thickness, hinges, drawer slides, and lighting so the stated cabinet depth reflects usable space.
Match storage capacity to your clothing, luggage and future needs
Count what you own before drawing the wardrobe: hanging garments by type, folded stacks, pairs of shoes, bags, accessories and suitcases. Add 15–20% for future purchases, then reserve capacity for bulky seasonal items instead of filling every compartment on day one.
| Storage zone | Planning allowance | Usable internal dimension |
|---|---|---|
| Hanging clothes | Measure garments across the rod | Short-hang section: 36–40 inches high; long-hang section: 60–66 inches |
| Folded clothing | Allow separate stacks for daily and seasonal wear | Shelf depth: 14–16 inches; keep each stack below 12 inches high |
| Drawers | Specify contents, not just drawer count | Drawer height: 6–8 inches for folded clothes; state usable width and full-extension length |
| Shoes and bags | Count pairs and larger bags separately | 12–15 inches clear width per pair; 14–16 inches depth |
| Luggage | Keep cases accessible near the entry | 20–24 inches clear depth on a low, unobstructed shelf or bench |
Double-hang rods provide more capacity for shirts and trousers, but they cannot replace a long-hang section for coats, dresses, robes or uniforms. Place frequently used items between waist and shoulder height; compartments above roughly 72 inches often become wasted capacity unless you keep a step stool nearby.
Specify drawers by usable internal width, extension length, dynamic load rating and adjustment method. A “soft-close” label alone does not prove that the drawer will carry dense clothing or survive repeated use. Leave clearance for hardware replacement, and retain a low luggage bay rather than converting every accessible zone into drawers.
Choose doors, zones and organizers around daily access
Choose the opening that preserves your bedroom’s working space, then place each category at its point of use. Hinged wardrobe doors give the clearest full-width access but need room for the swing; sliding wardrobe doors save floor clearance but expose only part of the interior at once.
An open wardrobe gives the fastest access, while glass wardrobe doors keep contents visible but still require fingerprints and glare control.
| Option | Access advantage | Best use | Main compromise |
|---|---|---|---|
| Hinged wardrobe doors | Full interior access | Daily clothing and wide drawers | Door swing needs clear floor space |
| Sliding wardrobe doors | No opening arc | Tight bedrooms and long wardrobes | One door can block half the storage |
| Open wardrobe | Fastest reach and visibility | Frequently worn clothes | Dust and visual clutter |
| Glass wardrobe doors | Contents remain visible | Coordinated outfits and display items | Cleaning and glare |
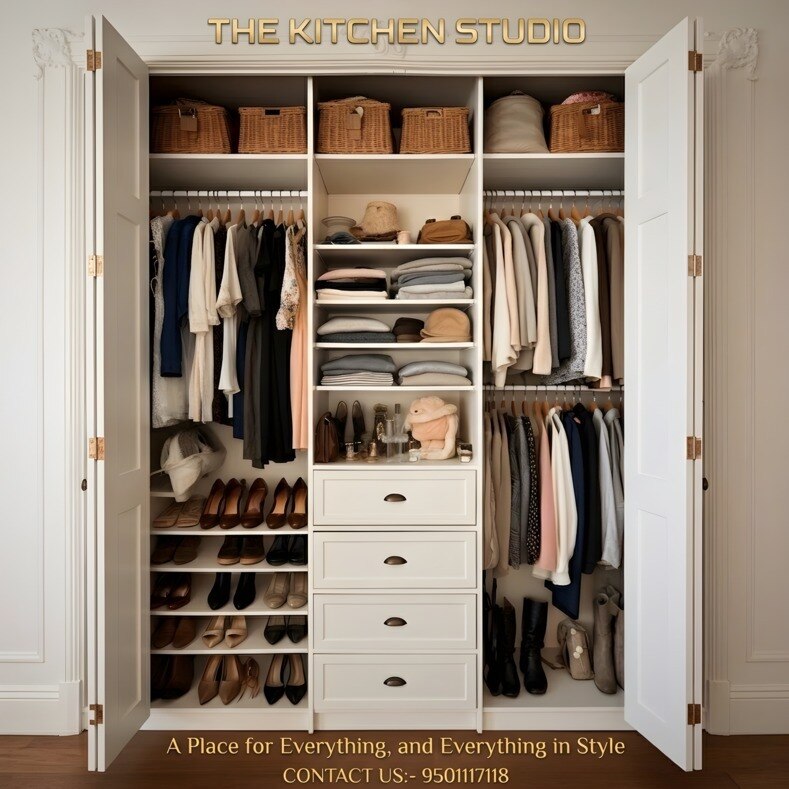
Keep daily shirts, trousers and workwear between waist and shoulder height. Put folded garments in drawers with full-extension slides, and specify usable internal width, extension length, dynamic load rating and adjustment method; “soft-close” alone proves nothing. Give shoes shallow pull-outs, accessories divided trays, and bags a vertical compartment.
Use a pull-down wardrobe lift only for occasional hanging garments. Its rating must include the rod, hangers and one-sided loading, or the mechanism can fail when clothes slide to one end.
Add door-activated lighting with a sensor that sliding doors or packed clothing cannot obstruct, and choose high color fidelity so navy, black, stains and damage are distinguishable.
Specify lighting, accessibility and durable interior materials
Specify lighting, hardware and finishes around the person using the wardrobe, not only the cabinet dimensions. Use sensor-controlled LED wardrobe lighting with concealed wiring, a neutral colour temperature and no exposed hot lamps.
Add drawer lighting where deep drawers or dark finishes hide contents, and place switches or sensors within the 15–48-inch reach range above the finished floor when applicable.
Preserve at least 30 by 48 inches of clear floor space at the usable storage position. Keep drawer pulls, valet rods, wardrobe lifts and lighting controls inside that reach zone so a seated user or someone with limited mobility is not forced to stretch.
Write every moving-hardware specification with measurable performance:
- State each drawer’s usable internal width, extension length, dynamic load rating and adjustment method.
- Specify side clearances and access for slide replacement; a soft-close label does not prove capacity.
- Give the wardrobe lift load rating for the rod, hangers and garments, including one-sided loading at the ends.
- Require a stated cycle life when the lift will be used daily.
A 24-inch cabinet depth can lose usable space to doors, hinges, slides and lights, allowing garments to rub or drawers to catch.
The Kitchen Studio can help translate a stainless fabrication approach into wardrobe details, but specify AISI 304 stainless steel for general use and 316 where chlorides, adjoining bathrooms or aggressive cleaning chemicals threaten hidden welds, brackets and fasteners.
Validate the design at full scale before fabrication
Tape cardboard panels or mark the cabinet footprint on the bedroom floor before approving fabrication. A full-scale wardrobe mock-up reveals problems that a plan drawing hides: a drawer colliding with a door, a hanging garment striking a shelf, or a bedside table blocking the opening arc.
1. Mark the wardrobe’s actual height, depth and door swings with painter’s tape. Include skirting boards, handles, window trims, ceiling features and sprinkler locations so the mock-up occupies the same space as the finished unit.
2. Place the bed, bedside table and luggage inside the room. Walk through the wardrobe aisle width with the doors open, and test whether you can stand, turn and remove clothing without trapping another person or obstructing the bedroom route.
3. Load representative items into temporary zones. Hang a coat, dress and robe in the long-hang bay; place folded clothes in drawers; test shoe boxes and accessories; then put a suitcase on the planned luggage storage shelf. A low, unobstructed luggage bay prevents suitcases from ending up on the bed or floor.
4. Test every moving part repeatedly. Pull drawers fully out, operate wardrobe lifts, open adjacent doors together and check that lighting controls remain reachable.
For accessible rooms, preserve 30 by 48 inches of clear floor space at the usable storage position and keep operable hardware between 15 and 48 inches above the finished floor where ADA conditions apply.
Record failures on a wardrobe installation checklist, revise the dimensioned elevation, and repeat the mock-up before ordering panels or hardware. A full-height cabinet is not a success if its best storage requires a step stool.
Frequently asked questions
What should you measure before choosing a wardrobe layout?
Record finished wall lengths and ceiling height, then mark skirting boards, columns, radiators, vents, sockets, switches, windowsills, curtain tracks and ceiling bulkheads.
How do you calculate wardrobe storage capacity?
List your folded clothing, hanging garments, shoes, luggage and future needs, then assign dedicated zones rather than relying on one general cabinet volume.
Which wardrobe doors and organizers suit daily access?
Choose hinged doors where front clearance is available and sliding doors where circulation is tight. Add drawers, pull-down rails, shoe storage and open shelves to match how you use each item.
How can you check a custom wardrobe design before fabrication?
Review dimensioned elevations and create a full-scale floor outline with tape or cardboard to test door swings, walking clearance, drawer access and reach heights.