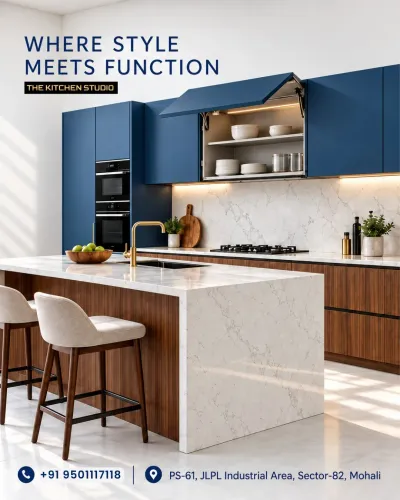

A luxury island fails when its proportions block appliance doors, force guests through the prep route, or prioritise a beautiful surface over service access. By working through clearances, zones, materials, utilities and installation checks, you can develop an island that looks refined while remaining comfortable and dependable during busy use.
Key takeaways
- Keep 1,000–1,200 mm between the island and opposing cabinets.
- Separate prep, cooking and cleaning zones to reduce crossing traffic.
- Use layered lighting, sealed surfaces and rounded edges for daily practicality.
- Confirm utility routes, appliance clearances and floor strength before installation.
Position the Island Around Clearances and Work Zones
Begin with a scaled plan showing walls, door swings, window placement, radiators, columns and appliance openings. Position the island so an open oven, dishwasher or refrigerator door does not block the main route or trap someone at the sink.
Leave about 42 inches (1,067 mm) between counters for one cook and 48 inches (1,219 mm) for two; commercial kitchens need additional room for carts, staff passing and service access.
| Role | Best placement | Main planning test |
|---|---|---|
| Preparation island | Between storage, refrigerator and cooking zones | Provide landing space on both sides and keep waste within reach |
| Cooking island | Near preparation and ventilation routes | Check hood overhang, heat protection and clear access around open equipment |
| Sink island | Between preparation and warewashing routes | Keep a dedicated handwashing sink immediately accessible; do not substitute a prep or bar sink |
| Storage island | Central to receiving, preparation and service | Confirm drawer extension, pull-out waste clearance and refrigeration access |
| Seating-focused island | On the social side of the room | Keep stools outside the cooking route and preserve the working aisle |
Size the island from its tasks, not from the room’s visual centre. Measure the equipment schedule in plan and elevation, including door swings, drawer extension, filter removal and service panels, then add usable worktop beside each appliance.
Allow roughly 24 inches of seating width per stool and a 12- to 15-inch overhang, while preserving a clear walkway behind seated users. Accessible portions need clear floor, knee and toe space and safe reach—not simply a lower countertop.
Size Seating, Storage and Services for Everyday Use
Set the working counter at 900–950 mm for comfortable preparation, with a separate bar height of about 1,050–1,150 mm for raised seating. Allow roughly 600 mm of linear space per stool and enough knee clearance for the seat to slide fully beneath the overhang.
Keep the walkway width at least 1,000 mm around working sides; 1,200 mm works better where two people cook together or appliance doors open into the route.
Match the island’s contents to the way your household uses it:
- Preparation: Put the main work surface beside refrigerated drawers, knives, mixing equipment and a waste pull-out.
- Cooking: Keep landing space on both sides of the hob, protect seating from hot pans, and coordinate hood capture with the appliance duty rather than hob width alone.
- Serving and family use: Place seating away from the cooking edge, with lighting and outlets positioned so stools do not obstruct drawers or circulation.
A lowered accessible segment does not require lowering the whole island. Give it the specified clear floor space, reach range, knee and toe clearance, and protection from hot or sharp equipment, then retain standard-height counters elsewhere.
Before fabrication, dimension drawer extension, waste-bin clearance, refrigeration ventilation, door swings and service access; provide a removable toe-kick or panel so condensers, controls and cooking modules remain repairable. Ensure heat-producing equipment has manufacturer clearances, ventilation gaps, noncombustible barriers and independent support beneath the worktop.
Combine Premium Surfaces, Lighting and Easy-Care Details
A luxurious island stays easy to maintain when you reduce joints, ledges and exposed hardware. Use large-format worktops with carefully sealed seams, then repeat one finish across the visible sides so the island looks deliberate rather than decorated.
Choose the surface according to the cleaning and heat it will face:
- Natural stone delivers distinctive veining, but porous varieties need the sealer specified by the fabricator and prompt cleanup of oils, wine and acids.
- Engineered quartz provides a consistent, low-porosity surface, but protect it from direct heat and follow the manufacturer’s temperature limits.
- Porcelain slabs resist staining and tolerate substantial heat, yet their edges can chip if unsupported or struck during installation.
- Stainless steel gives the most hygienic, repairable work surface; specify 304 for ordinary food-service use and 316 or 316L where brine, coastal air or de-icing salts are persistent.
Pair the surface with dimmable 2700–3000 K lighting and conceal the source beneath shelves or cabinets to avoid glare on polished stone. Specify a consistent brushed grain on exposed stainless steel, flush doors, sealed wall junctions and removable service panels. Avoid ornamental trims: every projecting strip becomes a grease ledge.
Never leave bleach or chloride cleaner on stainless steel, especially around welds and crevices, because pitting can follow.
Specify the Island Structure, Utilities and Installation Sequence
Protect the island’s appearance and service life by treating it as a coordinated cabinet, fabrication and building-services package—not a countertop placed on boxes. Specify 304 stainless steel for normal indoor conditions; choose 316 stainless steel or 316L where brine, coastal air or de-icing salts create persistent chloride exposure.
Approve a physical sample for the exposed finish, such as No. 4 brushed, and keep the grain direction consistent across doors, panels and end caps. Require continuously welded joints, ground smooth and finished flush, around sinks, drainboards and food-contact areas. Exposed screws, silicone beads and overlapping laps create crevices that trap grease and moisture.
Use this installation sequence:
1. Freeze appliance cut sheets before fabrication, including dimensions, ventilation zones, drain points, electrical loads and access requirements.
2. Mark plumbing, shutoffs, air gaps or indirect waste, condensate routes and electrical circuits on the floor before cabinets arrive.
3. Install the island carcass and welded stainless components, then check level, alignment, grain direction and clearances.
4. Fit appliances only after connections are tested; provide removable toe-kicks or concealed service panels for condenser cleaning, controls and replacement.
5. Seal and protect finished surfaces, then test every drain, shutoff, appliance, circuit and ventilation path.
Ask The Kitchen Studio or another fabricator to show where each service panel opens before you approve the drawings. Never leave bleach or chloride cleaner standing on stainless steel; it can pit the surface, especially at welds and crevices.
Related product
 | Ss Island Modular Kitchen View product → |
Test the Layout Against Room Constraints and Real Traffic
Choose the island type only after tracing movement on a measured floor plan. Mark every door swing, window, appliance opening, service route and seating position, then test the busiest path with two people carrying plates or unloading groceries.
| Option | Best choice when | Main warning |
|---|---|---|
| Fixed island | You need permanent preparation, cooking, storage or seating zones | It becomes an expensive obstruction if appliance doors, drawers or staff routes cannot open fully |
| Peninsula kitchen | One side of the room cannot maintain a comfortable island aisle | The return can trap people between the counter and a wall |
| Movable island | You need flexible prep space or occasional extra seating | Wheels do not solve inadequate storage, utility connections or parking space |
| No-island layout | The room is narrow, heavily trafficked or already well served by perimeter counters | Adding one will sacrifice circulation for a surface you rarely use |
Keep about 42 inches between opposing work surfaces for one residential cook and 48 inches for two; allow more in professional kitchens for carts, open ovens and passing staff. Treat door and drawer extension as part of the clearance, not an afterthought.
Walk the proposed route with tape on the floor. Reject the layout if dirty dishes cross the cooking or plating zone, a refrigerator blocks the main path, or a lowered accessible section lacks clear floor, knee and toe space. Pair that section with standard-height worktops instead of lowering the entire island.
Frequently asked questions
How much clearance should you leave around a kitchen island?
Allow 1,000–1,200 mm between the island and opposing cabinets for comfortable movement, and check that open appliance doors do not obstruct the main route.
How should you plan seating, storage and services on an island?
Set seating outside the main work route, place frequently used storage near the relevant work zone, and plan power, plumbing and ventilation before fabrication.
Which finishes make a luxury kitchen island easier to maintain?
Choose sealed, stain-resistant work surfaces, moisture-tolerant cabinetry, easy-clean splash protection and lighting that clearly illuminates preparation and seating areas.
What should you confirm before installing a kitchen island?
Verify the structural support, floor levels, appliance openings, electrical circuits, water and waste routes, ventilation path, delivery access and installation sequence.