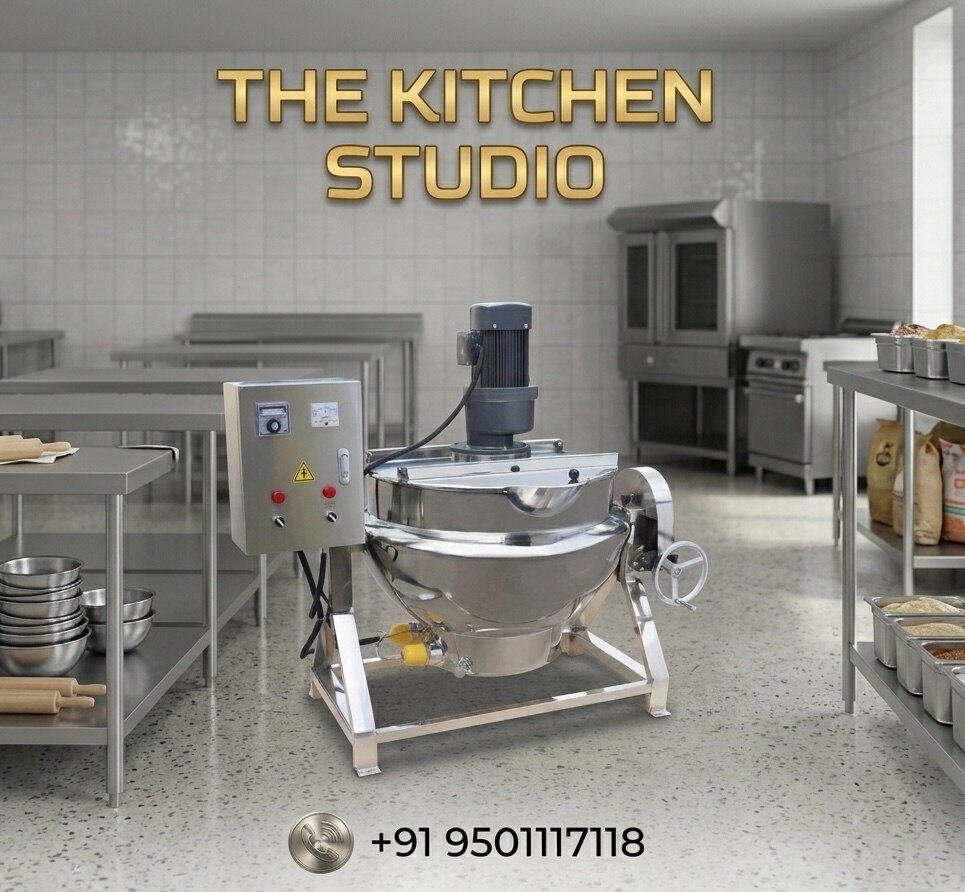
Choose a kettle from the hardest batch your production schedule demands, not from its advertised vessel size or motor rating. By the end, you will be able to calculate usable capacity, compare heating and agitation systems, specify hygienic construction, and write commissioning tests that reflect real production conditions.
Key takeaways
- Calculate capacity from product volume and the complete batch cycle.
- Match steam, electric or gas heating to the recipe and site utilities.
- Size agitators and outlets for the thickest, heaviest batch.
- Test heating time, discharge, cleanability and controls before approval.
Start With Usable Capacity, Not the Kettle’s Advertised Volume
Calculate industrial cooking kettle capacity from the product volume in each batch, not from the number printed on the nameplate. Start with hourly demand, available production time and the complete kettle cycle: loading, heating, cooking, unloading and turnaround.
- Convert required output to batch mass: hourly output ÷ planned batches per hour. Include expected yield loss from evaporation, trimming or transfer.
- Convert batch mass to product volume: batch mass ÷ product density. Use the density at the relevant filling temperature, since sauces and emulsions can expand or change density during cooking.
- Allow for headspace: divide product volume by the permitted fill fraction to obtain the required gross vessel volume.
For example, a 120 kg batch with a density of 1.1 kg/L occupies about 109 L. If the recipe permits a 70% working fill, the kettle needs at least 156 L of gross vessel volume before confirming the manufacturer’s dimensions and clearances.
Usable working volume is lower than gross vessel volume because foaming, boiling, thermal expansion, agitator clearance and safe discharge space consume capacity. Establish the maximum working fill with the actual recipe, not a water-only demonstration. Then check that the kettle can produce the required number of batches per hour after heat-up, cooking, unloading and cleaning.
A larger kettle does not improve output if its recovery time creates a production bottleneck.
Match the Heating Method to the Recipe and Utilities
Choose the heat source by the recipe’s tolerance for scorching, the need to control evaporation, and the utilities available at the installation.
| Option | Best fit | Main limitation |
|---|---|---|
| Steam-jacketed kettle | Sauces, soups, dairy products and delicate mixtures needing even indirect heat | Requires steam pressure at kettle inlet, condensate drainage, traps, strainers and jacket overpressure protection |
| Direct-fired kettle | Large batches needing strong heat input where a boiler is unavailable | Uneven burner zones can scorch viscous or sugary products |
| Electric cooking kettle | Sites without steam service, with adequate electrical capacity and precise control | High connected load can make recovery slow after cold ingredients enter |
| Direct-steam kettle | Water-based products where culinary steam quality and added condensate are acceptable | Condensate changes batch mass, solids concentration, viscosity and final yield |
Judge performance from the actual production duty, not the nameplate rating. Require a test using the specified batch mass, starting temperature, target temperature, agitation speed and product formulation; water-only tests overstate heat-up on viscous or particulate foods. Compare heat-up time, temperature uniformity and recovery time after ingredient addition.
For steam systems, record inlet pressure at the kettle, condensate temperature or flow, and recovery after each load step. Poor drainage causes water hammer and reduces heat transfer. For electric and direct-fired models, compare available electrical kW or burner output with heat losses, evaporation and fouling.
Verify the jacket or vessel rating, relief protection and applicable pressure documentation separately from sanitation certification such as NSF/ANSI 4.
Size Agitation and Discharge for the Hardest Batch
The hardest batch—not the average recipe—sets the kettle agitator and drive. Base selection on cold-start torque and end-of-cook viscosity or yield stress, then confirm the speed range rather than relying on motor horsepower. Particle size and fragility matter too: a high-shear impeller can disperse powders but entrain air, break solids or damage delicate foods.
Request the maximum allowable particle size and impeller clearance.
| Option | Suitable duty | Watch for |
|---|---|---|
| Anchor agitator | High-viscosity sauces, fillings and pastes | Requires adequate starting torque; confirm it will not stall at cold start |
| Paddle agitator | Gentle mixing of products containing particulates | Match blade geometry and clearance to the largest solid |
| Sweep agitator with scrapers | Thick products needing wall and bottom contact | Scrapers renew the heated surface and reduce localized burn-on, but require inspection and hygienic access |
Specify the transfer arrangement with the agitator:
- Select a tilting kettle when viscous product must pour quickly with minimal manual scraping. Allow space for the tilt path, agitator-drive clearance, guarding, flexible piping, electrical cabling and cleaning access.
- Select a fixed bottom outlet for closed transfer, pigging or a sanitary drain connection. Size the valve, outlet and transfer pump for the product’s viscosity and particle size.
- Require documented discharge time at the hardest batch condition. A kettle that empties easily when warm and thin may leave heavy residue when the product reaches its final viscosity.
Specify Construction, Controls and Hygienic Cleanability
Specify 304 stainless steel for most product-contact surfaces, upgrading to 316 stainless steel where chloride-rich ingredients, brine, acidic formulations or aggressive cleaning chemicals could cause corrosion. Require a documented alloy grade, not a generic “food-grade” claim.
| Material | Specify | Failure avoided |
|---|---|---|
| 304 stainless steel | Product-contact shell, fittings and agitator | General corrosion and difficult verification |
| 316 stainless steel | Chloride, acidic or highly corrosive service | Pitting and premature surface damage |
| Sanitary weld finish | Continuous welds, ground and polished flush; no pits, cracks or undercut | Bacteria traps and residue buildup |
Demand fully drainable surfaces, radiused internal corners, minimal crevices, short hygienic fittings and accessible agitator seals. State the required sanitary weld finish and surface-finish criterion in the purchase specification, then identify the applicable NSF/ANSI 4 edition and scope rather than accepting “NSF compliant” without documentation.
Specify a jacket rated for its design pressure and temperature, with pressure gauge, relief protection, drain and inspection documentation. The jacket and product side require separate pressure assessments when either is pressurized. Ask The Kitchen Studio or another fabricator to show the jurisdiction’s pressure-equipment and electrical compliance documents.
Use a calibrated RTD or thermocouple, a displayed set point, independent high-temperature cut-out, recipe data logging and an agitator-speed interlock. Include alarms for sensor failure and loss of heating utility.
A CIP capable kettle needs more than a spray ball. Require documented spray coverage, flow rate, temperature, detergent concentration, contact time, drainage and cleaning validation for the installed agitator, seals and fittings. Specify removable scrapers, compatible polymer grades and inspection access; worn fragments or shadowed surfaces can contaminate the batch.
Verify Production Performance Before You Approve the Purchase
Approve the kettle only after a kettle commissioning test on the hardest production recipe, at the specified batch load. A no-load water demonstration proves little: viscous or particulate products heat and mix differently.
1. Record heat-up time from the documented starting temperature to the recipe set-point. Measure product temperature at several locations and depths to establish temperature uniformity, then compare every result with the validated time-temperature limit.
2. Run the agitator at its validated operating speed and inspect samples from the top, centre and bottom. Confirm that solids, seasoning and viscosity are consistent; a hot surface with a cold centre is a failed process, not a successful heating test.
3. Add ingredients in the real sequence and quantities, then record recovery time after ingredient addition. Confirm that the product returns to the required temperature without scorching, excessive evaporation or an unsafe hold period.
4. Discharge through the intended outlet, pump and pipework at production viscosity. Measure transfer time, retained product and manual scraping; test the tilt path, closed transfer or sanitary drain connection that operators will actually use.
5. Record batch identification, temperatures, agitator speed, utility pressure and test results. Verify relief protection and pressure-vessel documentation under the installation jurisdiction. Treat NSF/ANSI 4, electrical listing, sanitation evidence and process performance as separate approvals; none substitutes for the others.
Frequently asked questions
How do you calculate the usable capacity of an industrial cooking kettle?
Divide hourly production demand by available production hours, then account for loading, heating, cooking, unloading and turnaround. Size the kettle from the product volume each batch requires, not its advertised total volume.
Which heating method should you choose for a cooking kettle?
Choose steam, electric or gas by comparing the recipe’s heating requirements with available utilities, temperature control, installation capacity and operating conditions. Steam suits sites with dependable boiler capacity, while electric heating simplifies utility access where electrical supply is adequate.
Why do agitation and discharge need to match the hardest batch?
Thick, sticky or particulate-heavy products create the highest mixing torque and discharge resistance. Specify the agitator, motor, outlet and valve for that batch rather than the easiest recipe in the production schedule.
What should you verify before approving an industrial cooking kettle?
Run a representative product trial and record heating time, temperature uniformity, agitation performance, discharge time, residue after draining and cleaning access. Confirm the controls, welds, internal finish and safety features against your specification.